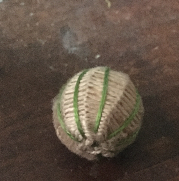
The entari-gown (entari is the right word) is cut and hanging out so the hem can relax, and I’ve been making buttons for it. Not sure how many I need yet, but lots.
One of the common differences between a well-made period-costume and an extant piece (or what you see in a painting for that matter) is that modern sewers often don’t use enough buttons. If they’re using metal buttons, that jives, because metal buttons were (and are) expensive. But usually what you see on doublets, and on the significantly fewer women’s garments that have buttons, are thread buttons. That is, a wooden bead covered in silk thread. Those buttons cost almost nothing but labor, and labor was cheap. So, rather than being obviously utilitarian closures, the buttons were part of the embellishment on the piece. In fact there are often extra buttons just hanging out on shoulders, where there is no need for a button to be, except it looks pretty. And so, as with other embellishment, there tended to be a LOT of them. Like, a lot.
More than five. There’s fifteen visible buttons in this painting, and this is a conservative doublet with large buttons. Check out this extant piece at the V&A:

’bout 30 on this one, counting the sleeves, and it’s got a high waist!
I’m currently button-training Cesare. The first doublet I made him had eleven buttons, but I’ve got him up to seventeen now. I’m hoping to peak out around twenty-seven, if he doesn’t go into full revolt before then!
There are a number of ways to cover a button, but the most common and probably easiest one is the woven silk one with ribs. Not a tabby weave – you can do that too – but a simple round-and-round that gives you a plain ribbed button, which you can then decorate with contrasting thread or pearls or what have you.

The button is constructed on a plain wooden bead, around a 1/2 inch or whatever size you want. They can also be oval beads. I pick up beads whenever I can at the dollar store or wherever. It doesn’t matter if they are painted or not, since they will be completely covered in thread. For thread, use fine silk or decent quality embroidery floss – I specify decent quality because it is a pain in the behind when your thread breaks, as the cheaper threads are wont to do. And you need a needle – any size as long as it is sharp.
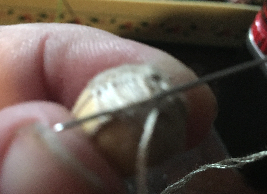
To make the ribs, knot your thread (you want to work with as long a piece of thread as you can stand), thread your needle and run it through the bead. Then go through the threads just above the knot, to create a loop in which the button is caught.

Pull that loop tight, and go through the middle again – and again, and again, looping the thread around the bead each time.

You want seven or eight loops. Too few and the button won’t cover evenly, too many and you’ll go mad.
Once you’ve got your loops, bring the thread through one more time so it is coming out what we will now call the “top” of the button. Then lock that thread by putting your needle from right to left under one of those thread loops, and pull it snug.

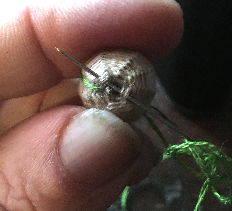
Now you are ready to begin covering the button. In fact, you’ve already started! All you have to do is move to the next rib to the right, and again bring your needle under it from right to left. Make sure your needle comes out OVER your working thread, as in the picture above. This will help when you come to the second half of the button, where the bead starts getting smaller again, It’s easy to control your thread and keep it tight when the button is getting wider, as it gets narrower it will matter very much that your thread is below that needle, trust me on this.
So you just keep going around, moving one rib to the right, and bringing your thread under from right to left each time. As you go around you can start to see how the threads are beginning to cover:

At least, if you stare really close at this picture, you can see a ridge forming around the hole at the top of the button. And if you just keep going around and around, it will start to look like this:

You will also notice, as you get more coverage, that while the button is pretty smooth, the “ribs” you’re working around form little bumps in the smooth thread. That’s ok, you want that.

Just keep going. Now, at some point in this process, you may run out of thread, or have your thread break. If that happens, it’s easy enough to splice in a new thread. Just bring the old thread down to the bottom and out of the way, running it alongside the rib that it last went under. Tie a big knot in a new thread, and bring your needle up from the bottom through the middle of the bead – the knot you tied should catch on some of the threads already running through there, but don’t yank too hard or it’ll pull through. Just let it catch.
Bring your needle up at the top of the rib you’ve just finished, and then run it down under the worked threads alongside that rib. It won’t add much bulk, it’ll be fine. You may have to do this in stages, bringing the needle out and putting it back under again, depending on how far you’ve got around the curve of the bead.

When you get to where your thread ended, come up just above that last thread, as if you’d just wrapped the rib, and continue on to the next rib to the right as before. As you come around to it, work around both that rib and the old thread running next to it together, and that will bury the old thread in the work.
And that’s it – just keep going until you’ve covered the whole bead. Which I warn you usually takes about half an hour, so if you’re planning to do a ‘proper’ number of buttons – or even just a few – leave yourself time. The good news is it’s really easy to do while chatting, or watching TV.
At the end, what you have is this:

Which I agree, is pretty boring looking. But now you can embroider on it, or wrap it in contrasting thread and it’ll get all dramatic looking. To wrap it, you can use thicker thread – I didn’t, in these pics, but it actually looks sharper if you do. Again, tie a knot in your contrast thread and bring it up through the center like you did for splicing – but this tine you want to come up between two of the ribs.

Wrap your thread down the valley between those ribs and pull it nice and snug. Instead of going through the button again, go across under some of the wraps on the bottom and come up a valley on the other side. Same thing at the top, go across the top catching it under the threads of the first wrap, and down the nest valley over from where you wrapped it before.


When the valleys each have a thread in them, put your needle through the centre of the button once or twice, burying the end of that thread inside, and just snip it off at the bottom. It will stay buried.

If you want, you can put a fluffy tuft of thread coming out the top, or stitch a pearl on – that’s what I’m going to do with mine. Or just leave it as it is, a simple, pretty button.